Those of you that know me know that I love me a good headband. Whenever I am having a blah hair day it is my go to item. Lately I have been a little obsessed with wanting to make my own headbands specifically ones with flowers that have the ability to be taken off the band and switched out. I created this post to go through the steps on how to make a cute one that is both simple and quick to put together. Before I begin though I NEED to tell you about my trip to Michael's to purchase the items for this little project. First of all it was one of the very few times I have been out of the house since having Dominick and Noah. For that reason I think I was a little overwhelmed and excited at the same time. I mean I am out of the house and then to top it off I am at the best place on the freakin' planet!!!!! All that aside my sis and I were on a mission. We had only two items to get :
We not only left with those items but also stuff to make these headbands and two baskets to complete my front entryway. Yes it might not seem like a lot but typically I stick to my list but this time I allowed for an exception. Well as Marissa and I were in line (next up to be exact) there was an older woman "paying". I use the word paying loosely here because she wasn't actually paying at all. Yes, she was standing at the register but she was still shopping. She asked the cashier to have another Michael's worker search the store for two specific colored flowers because she just thought they would be a great addition to her shopping experience. Meanwhile the line was growing and the ONLY cashier was proceeding to be very kind but annoyed at the woman. The coworker returned with the requested flowers and the woman proceeded to say that one of the flowers was not the color she had requested, " this is more of a sky blue, I wanted an aqua ( turns to all of us in line) Does this look aqua or sky blue???" I think every person in line wanted to hurt this lady. First of all you are still shopping when you should be paying. Secondly, we could care less what color your little heart desires because you are holding up the line!!! Man, the audacity of some people. I guess a sense of urgency and respect for others time is not something everyone has. Well let's proceed to my B-E- AUTIFUL hair accessories!!!
 |
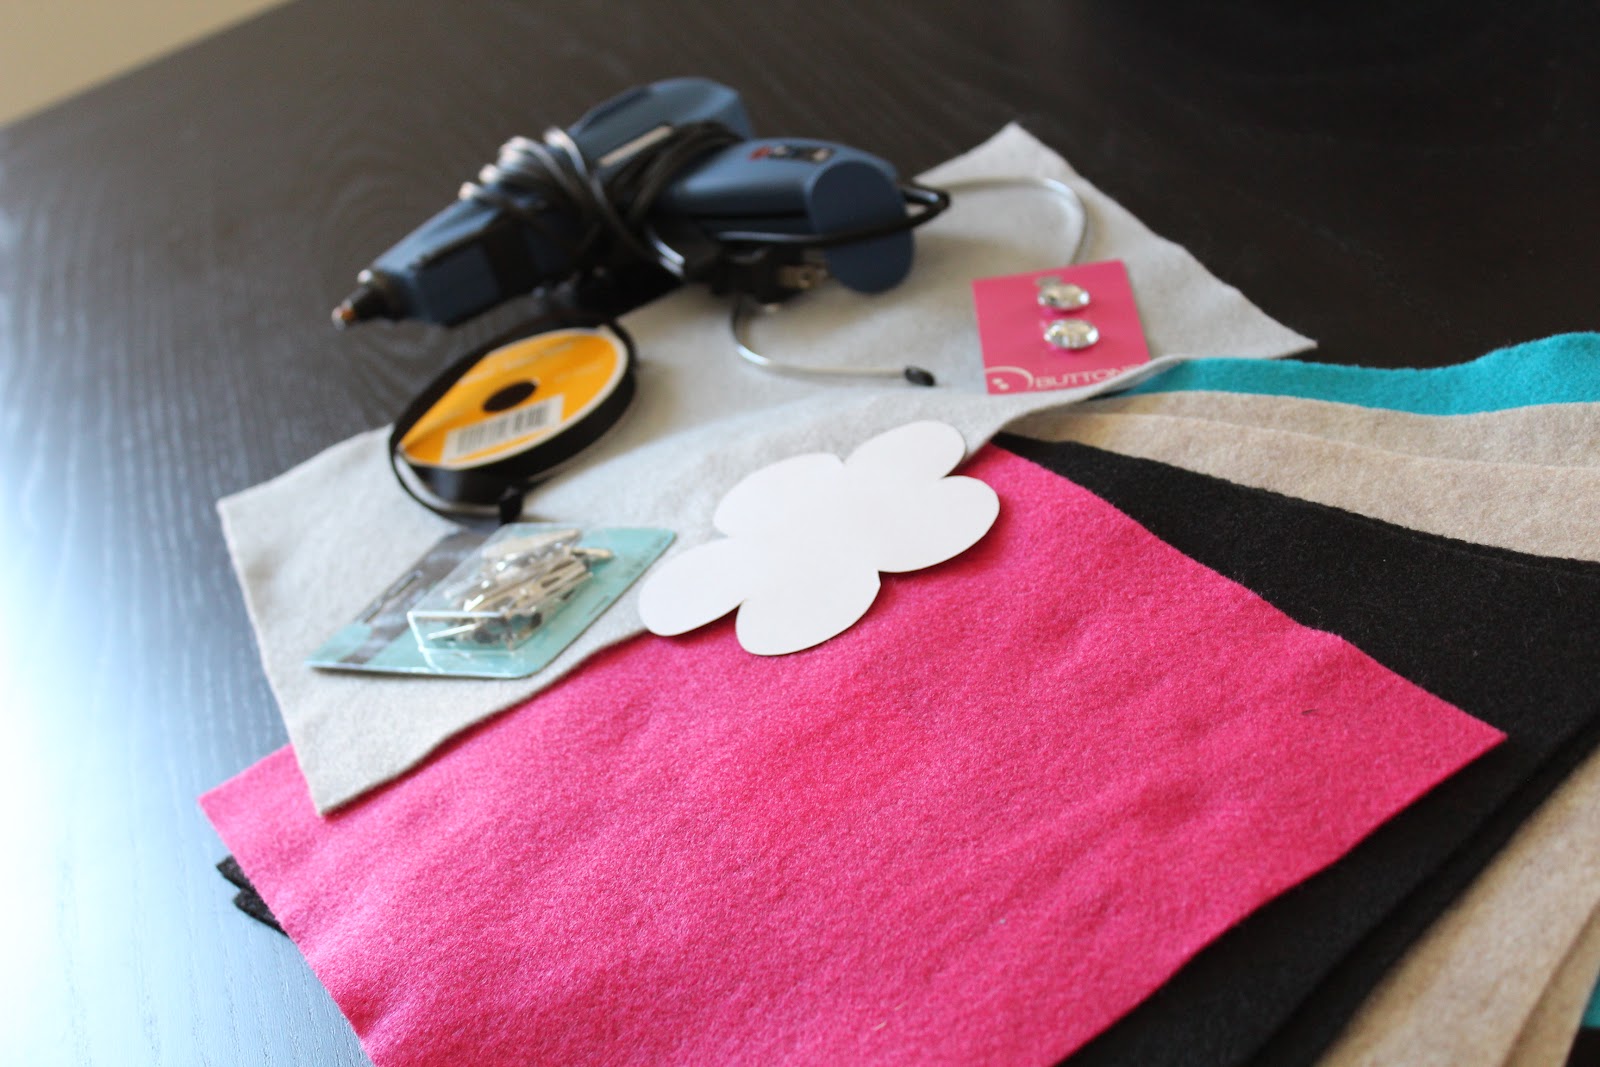
What you need:
hot glue gun
flower template
8.5X11" felt sheet
clips
rhinestones or any embellishments
*headband
*ribbon to cover headband | | | | |
| |
 |
| Look at all of the felt we got!!! Kinda excited!! |
 |
| First, take the flower template and trace it 6 times on the felt sheet. You will only need 5 but I like to have extras for other projects! No waste here! |
 |
| Cut them out. I will even use the scraps for something else! |
 |
| Now with each of the flower cutouts, fold in half as I have done here and place a dot of glue where my finger is to glue the sides together. |
 |
| Layer the halves together , rotating as you go. Take your embellishment and glue in the middle of the flower! |
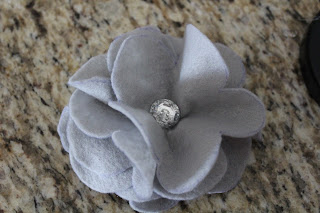 |
| Cute HUH!!! |
Okay so when I was gluing the diamond on my stupid finger got in the way and I burnt the sh%* out of it. Now you can't see it here but it hurt really bad when I went to wash my hands. I thought my fingertip was going to fall off!!!!
Lastly, take the clip and glue it to the back of the flower. Now you have a cute flower to add to a headband, a purse, a cardigan, belt! Whatever your little heart desires. My next post will demonstrate all of these. I would do it now but the hair is not so cute (remember I am a new mom ). Have a great night and I will post more tomorrow!!!!


No comments:
Post a Comment